
When you first open iMovie, you should get a message that says something like “Welcome to iMovie” and an option to pick between a ‘trailer’ or a ‘movie’. For this tutorial, we will be choosing ‘movie’, as ‘trailer’ comes with many presets.

Once you select which type of project you would like, iMovie presents you with the project editing window.
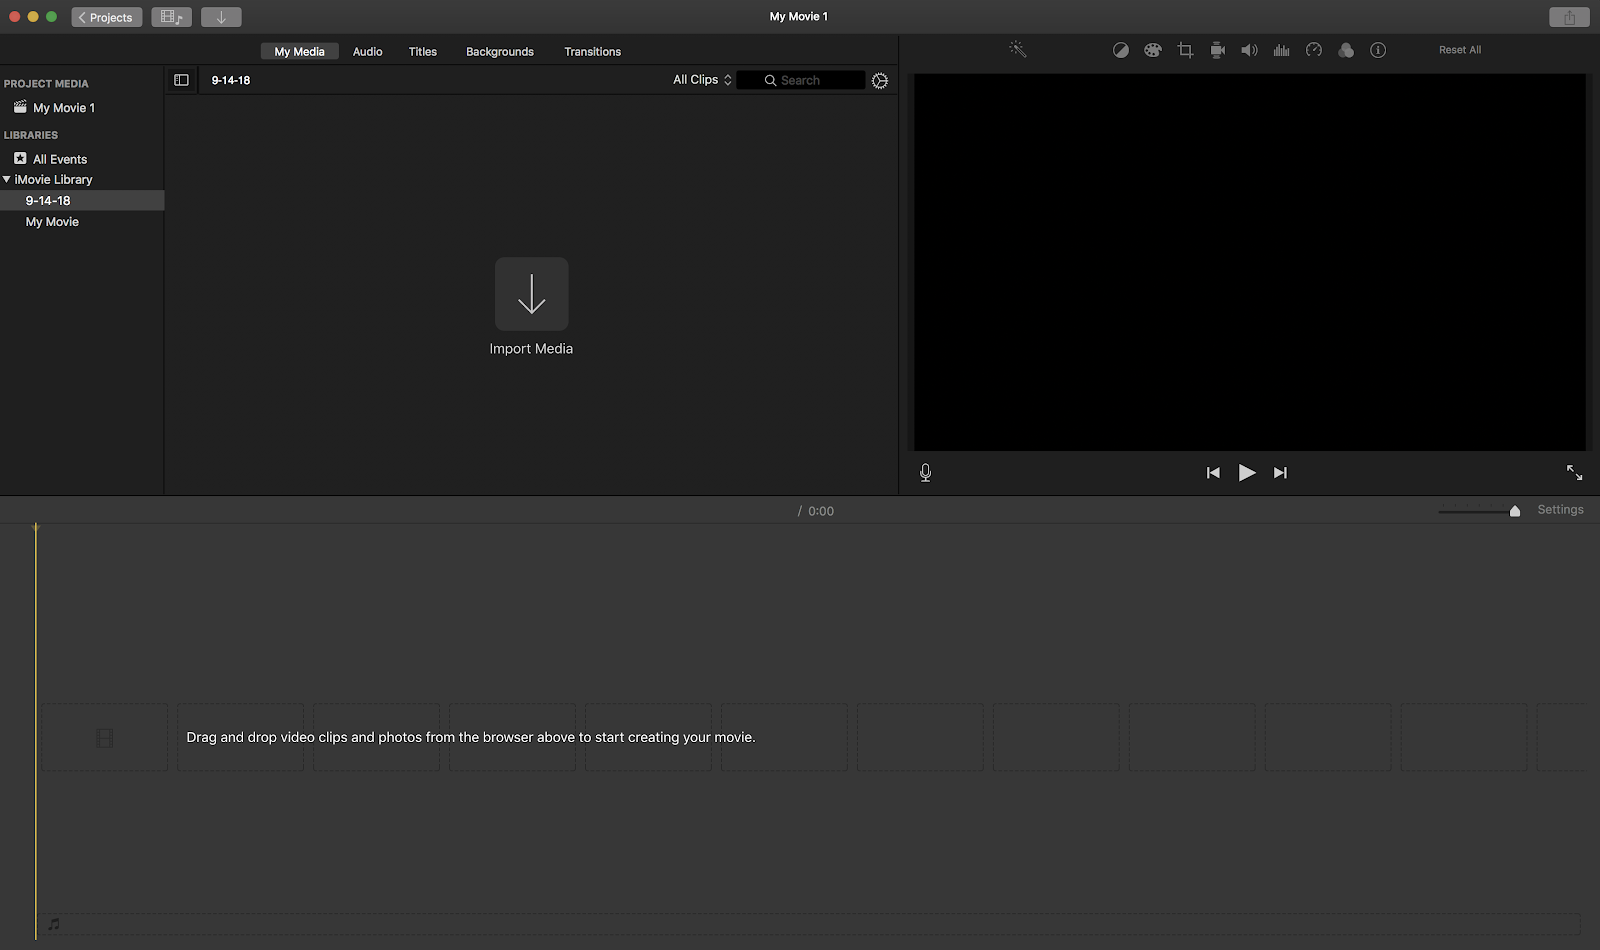
The iMovie project editing window holds many different tools and options. As a reminder, there is no save button in iMovie because it automatically saves. iMovie projects are also extremely hard to transfer from one device to another, so be sure to use a device you can return to and complete your video.

Top left has the standard red close button (see “What is iMovie for important note on closing iMovie”), yellow minimize button, and green expand/decrease button. Next to them are three buttons: one that will take you back to the projects, one that allows you to see media, and one that will let you import projects, respectively.
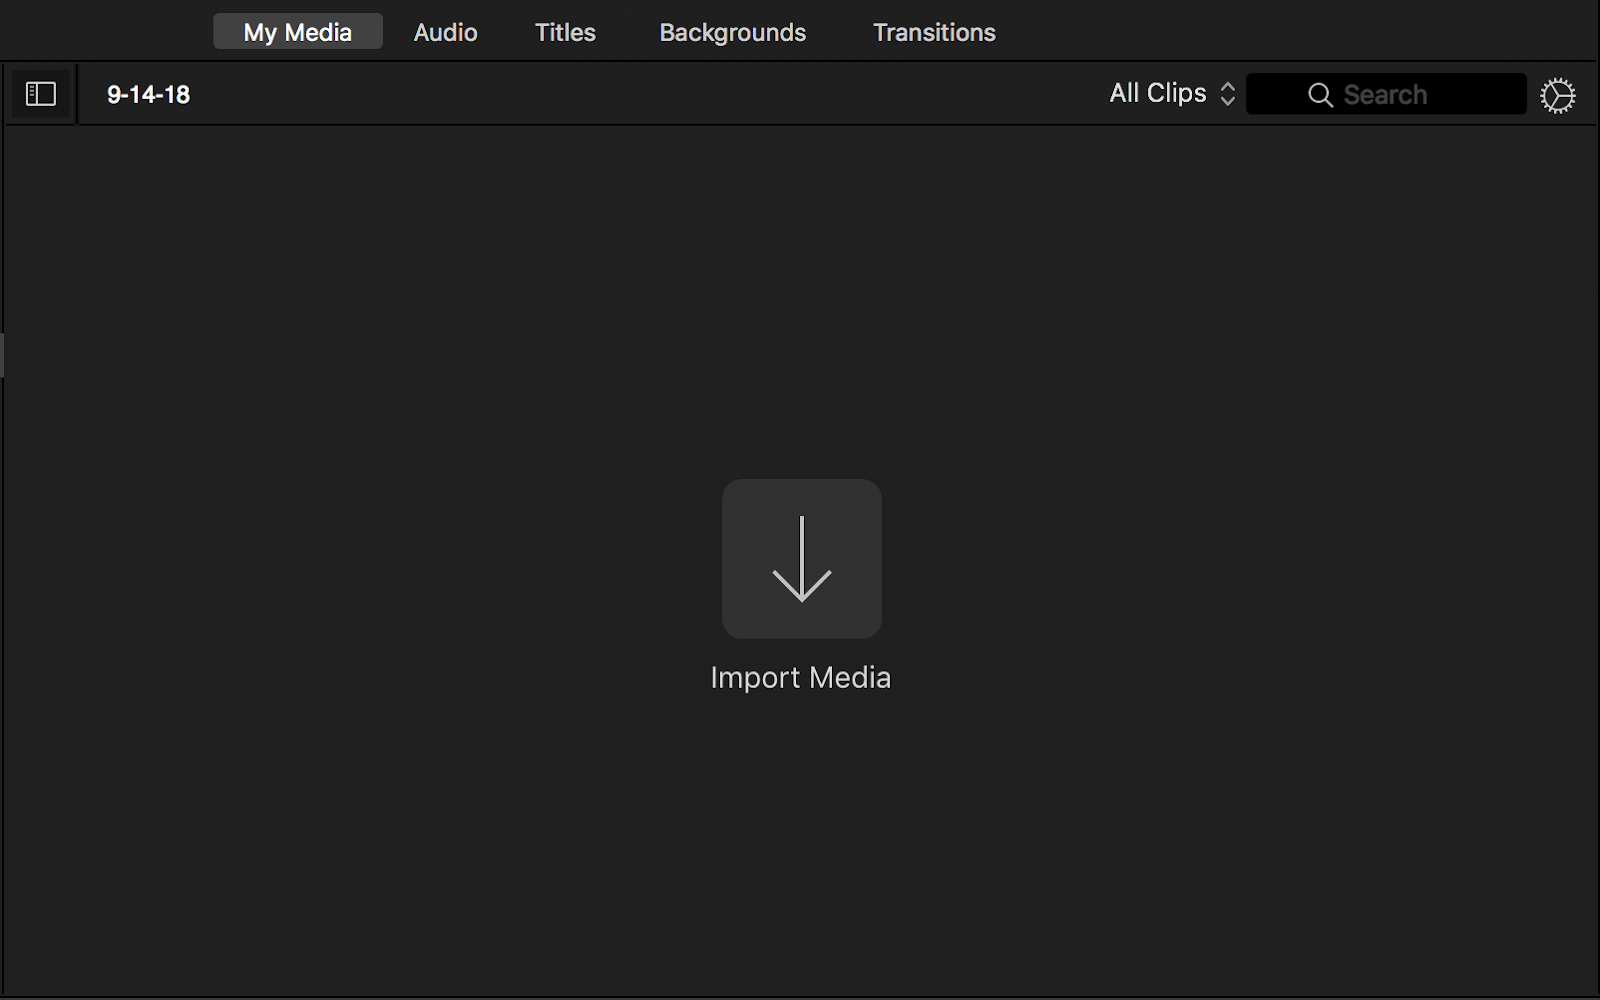
In the center space is where your media will appear as you import it. The button in the center is another way to import your audio, video, still images and etc. This is also where different effects from iMovie will appear as you browse through them. Think of this space as your material to work with. Selecting “My Media” will show all things you have uploaded into iMovie. Audio will take you so all sound effects, jingles and short audio clips that iMovie has in its library (and subsequently within the iTunes library). Titles contain all text transitions you will need. This includes Opening Titles and Credit of various styles and colors. Backgrounds holds simple and complex backdrops you can layer media on top of. Finally, transitions hold various animations that will carry one clip to another in a narrative fashion.
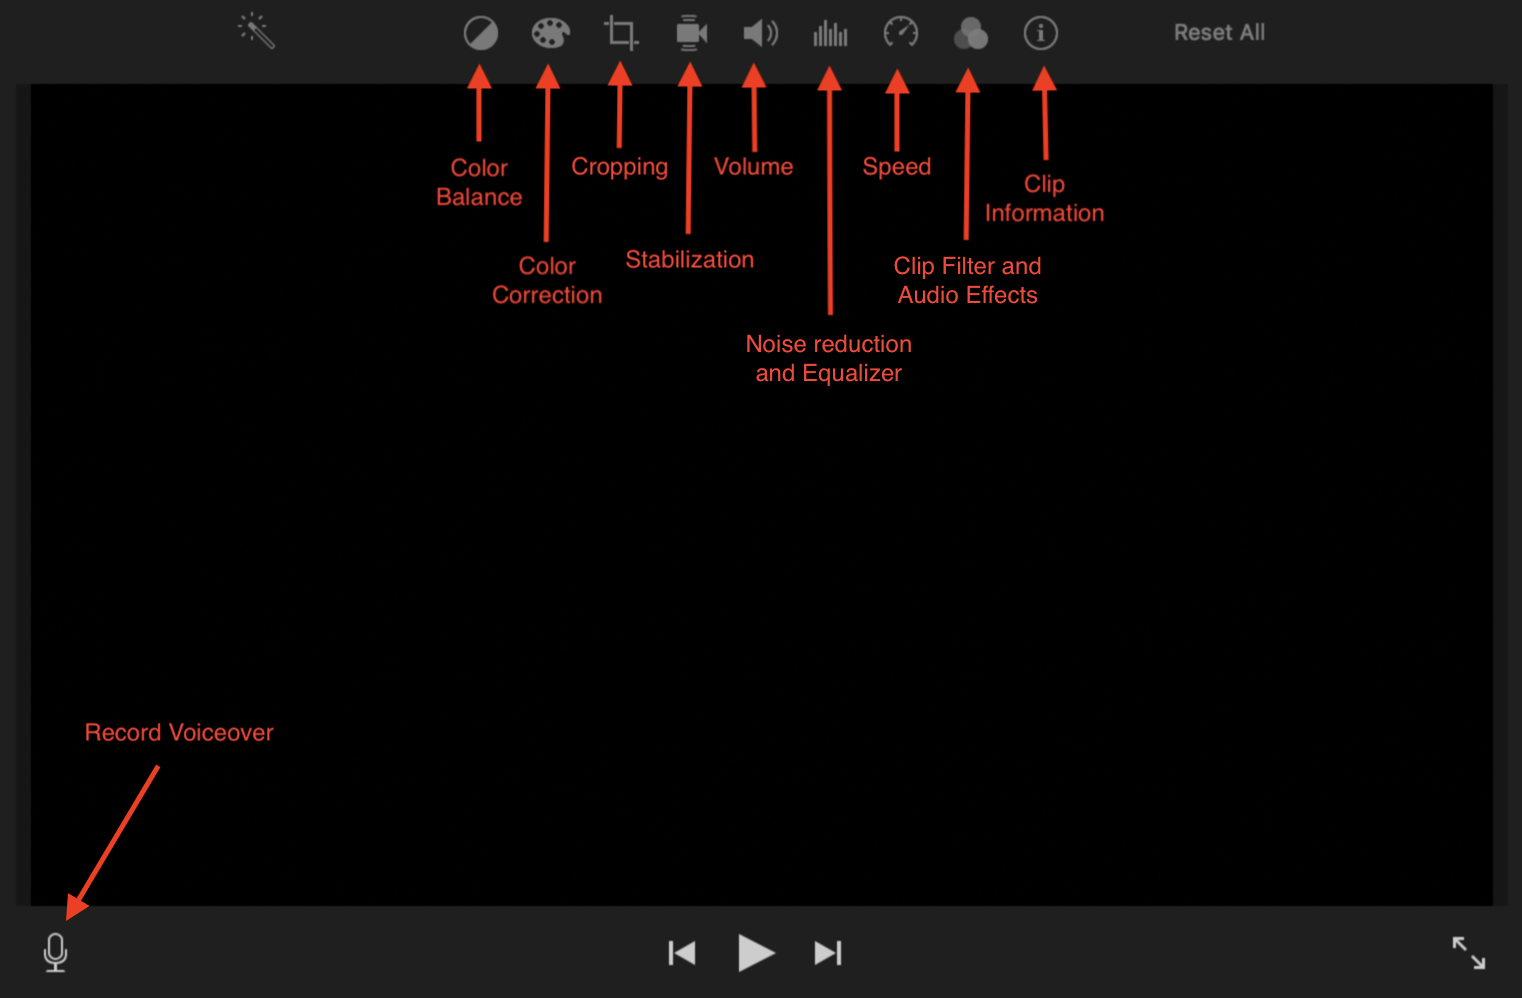 The preview pane is on the right. This is where you’ll be able to see your edits as they will be in the exported version as well as preview clips by rolling over them. At the top of the preview pane is tools to transform the clips.
- Color Balance – auto change the contrast/brightness/saturation
- Color Correction – manually change contrast, brightness, or saturation
- Cropping – make the frame smaller
- Stabilization – If your clip is shaky, this can help make it less so with digital editing
- Volume – Change the volume of the clip
- Noise reduction and Equalizer – Remove or amplify specific back/foreground noises
- Speed – Change the pace of the selected
- Clip Filter and Audio Effects – quick choose audio/visual effects and filters
- Clip Information – Gives you metadata of the selected clip
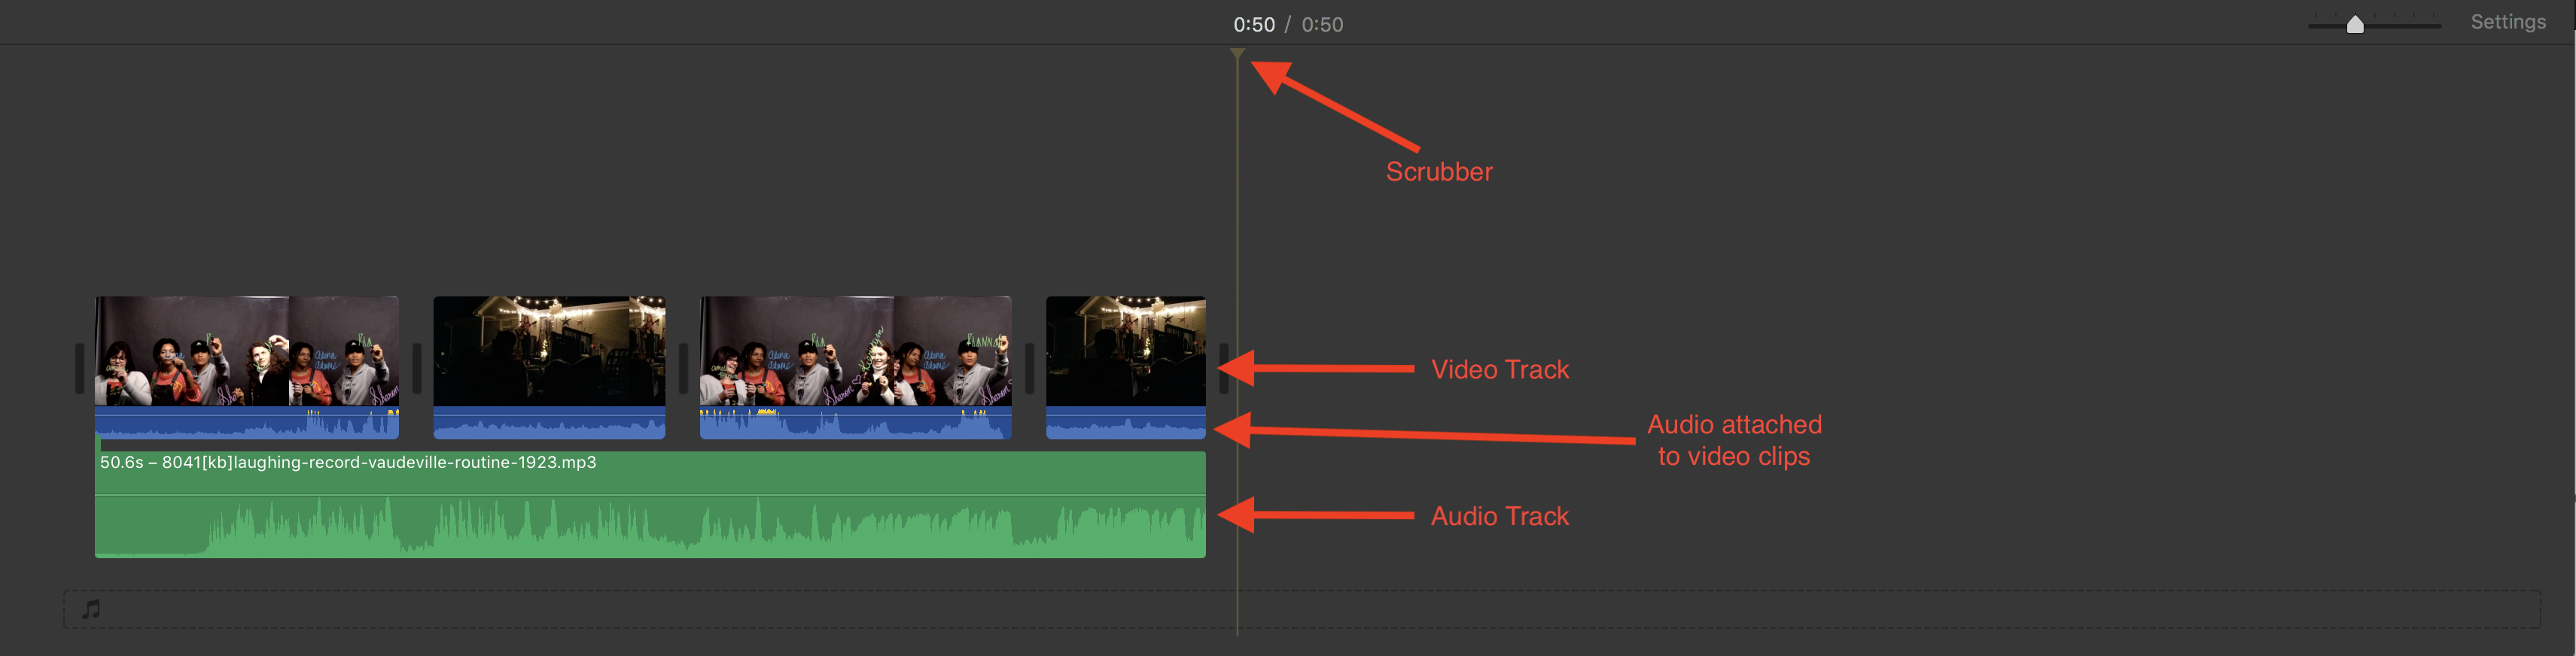
The long area at the bottom of the editing window is your timeline. This is where you will drag your media to edit and arrange them as they will appear in your final video. You’ll notice in the image we have pointed out the specific tracks. The top tracks will hold video, the bottom will hold audio. (Click on the next tab to learn more about layering.)
To begin editing a movie together, you first will need to import your clips to edit. Click on the downward facing arrow in top bar[1],

or in the clip area[2], 
or go to file>import media[3]. 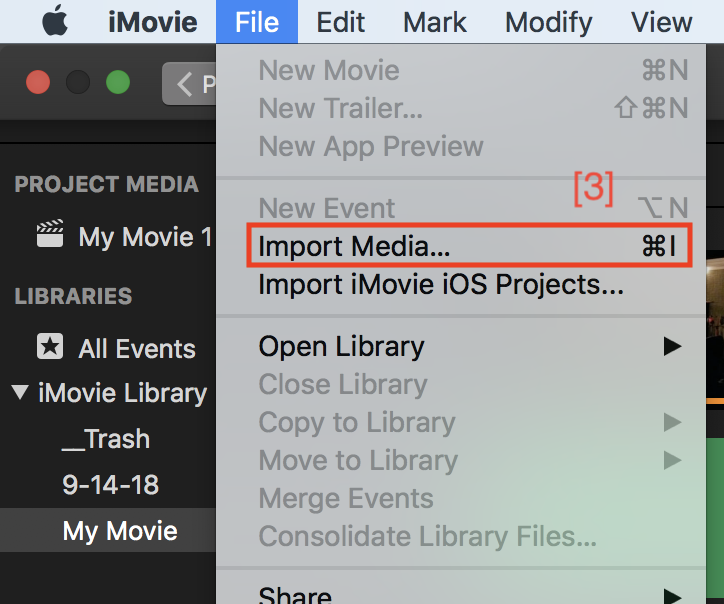
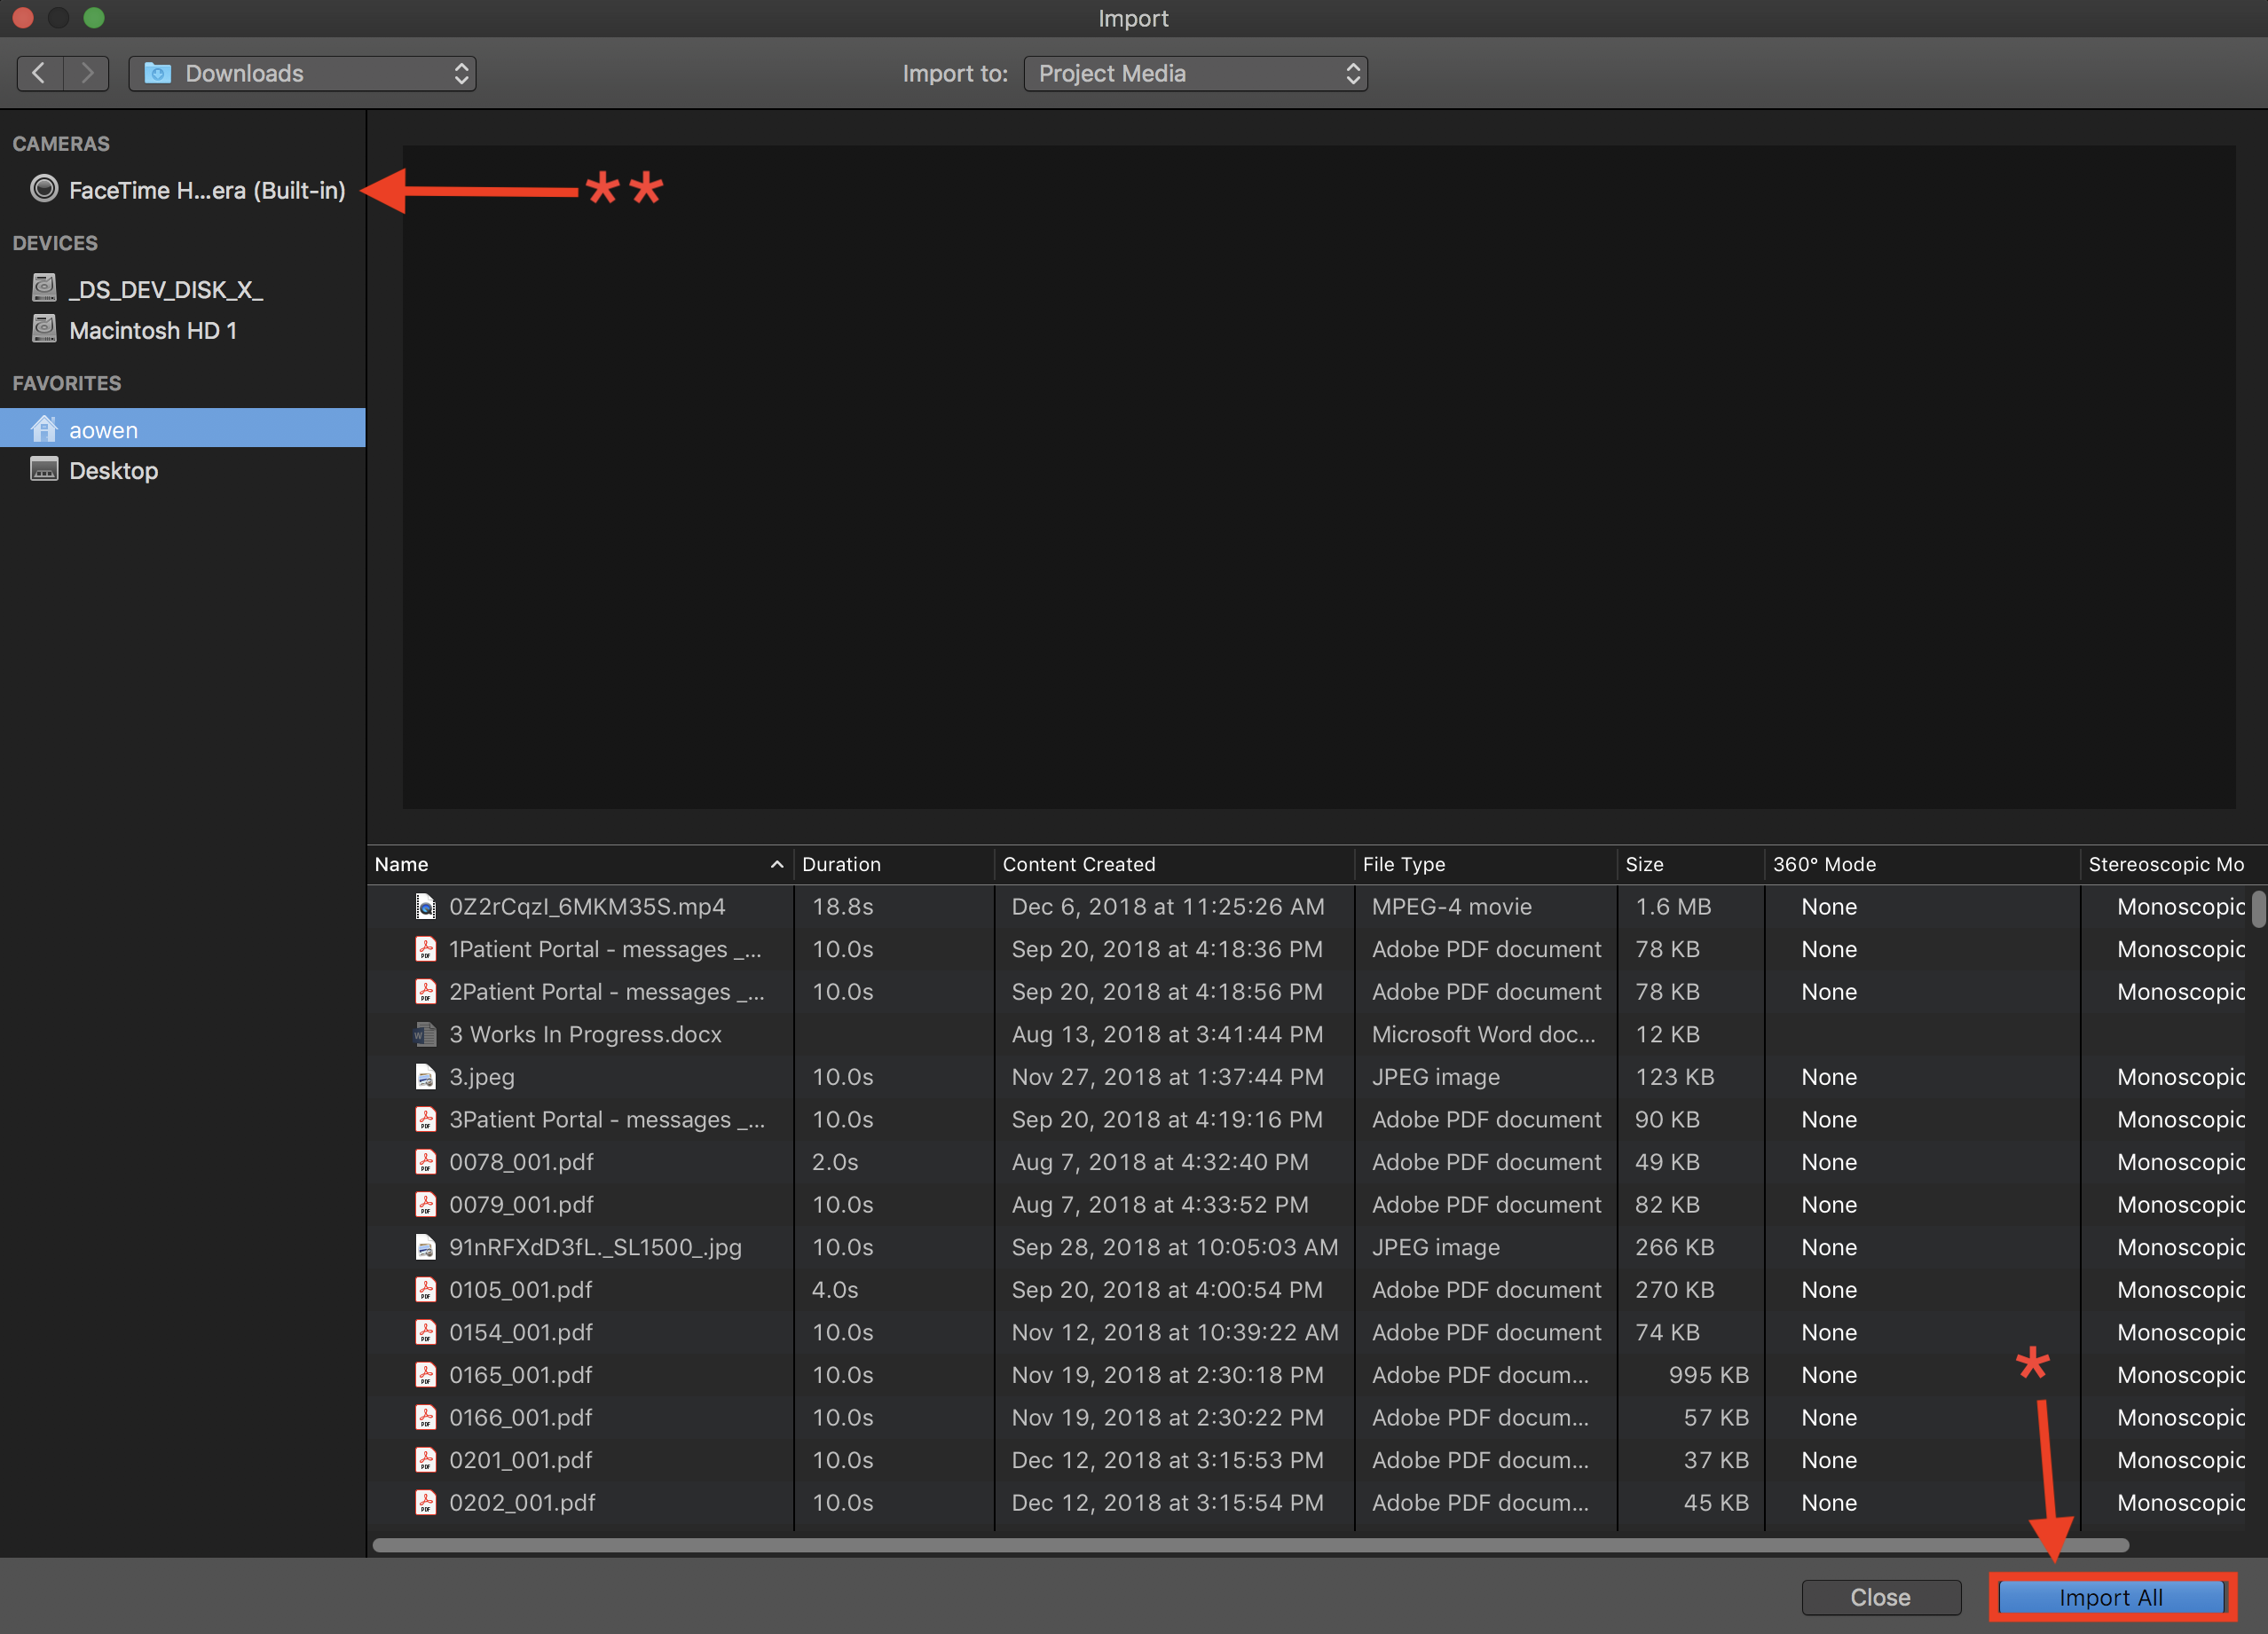
All three methods above will take you to the browser. Here you can navigate to where your clips are stored, including shared drives or USB drives you may have plugged in. Simply click on the clips you want to import, and select the blue import button at the bottom of the window(*).
If you would like to import a recording from your webcam, aka take a video right there and there, simply click on your webcam option at the top of the list on the left hand side (**).
Once finished, you should see the media appear in the center space. There you can scrub through them and preview through the preview pane, or drag them down to the timeline to begin editing.
Editing in iMovie is very similar to editing in most timeline-editing programs. So some of these tools and techniques may be familiar.
1. Move Clips Down to the Timeline
In order to begin editing, you will need to move clips from your center media area down below to the timeline. Simply click and drag it down.
You can also make use of the yellow scrubber(or playhead) that follows your mouse as you hover over clips. It allows you to preview it in the preview window.
The timeline works in layers. Clips farther up the timeline vertically will ‘cover’ the clips underneath it. So if you were trying to place an image over a clip, you would drag the image onto your timeline over top of the background clip.
Each clip can be dragged around the timeline to place it in a specific space. You notice that if you were to drag a clip in front or behind another, there is a sport that the clip would snap to. This also applies to music and any transitions/effects you apply to a clip.
2. How to Cut/Trim Clips
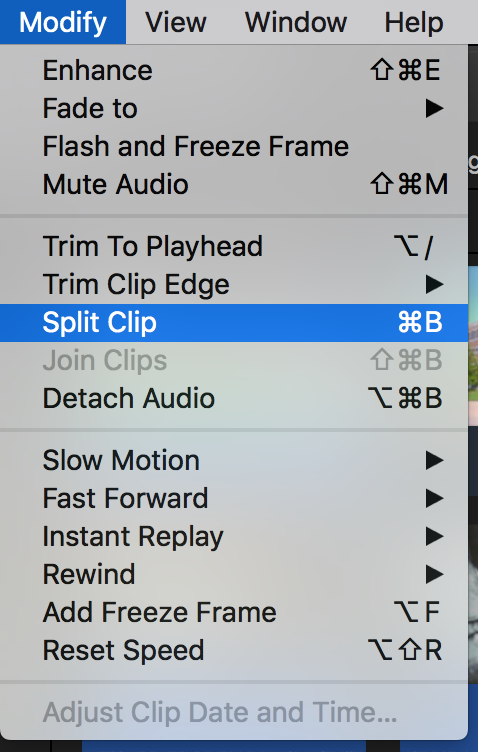
The playhead can be used not only as a scrubber but as a way to split a clip up into two different clips. Simply click where you want to split your clip and your playhead will stay in that position. Then select Modify>Split Clip.
 Then your clip will be split into two parts that move independently from one another.
If you want to trim a clip, or shorten/lengthen a clip, you can do this also using the playhead. First click on the clip you with to edit. it should be highlighted in a yellow border. Then hover over one edge of the clip and you should see your courser change to ←|→. This means you can drag the edge back and forth to lengthen or shorten a clip.

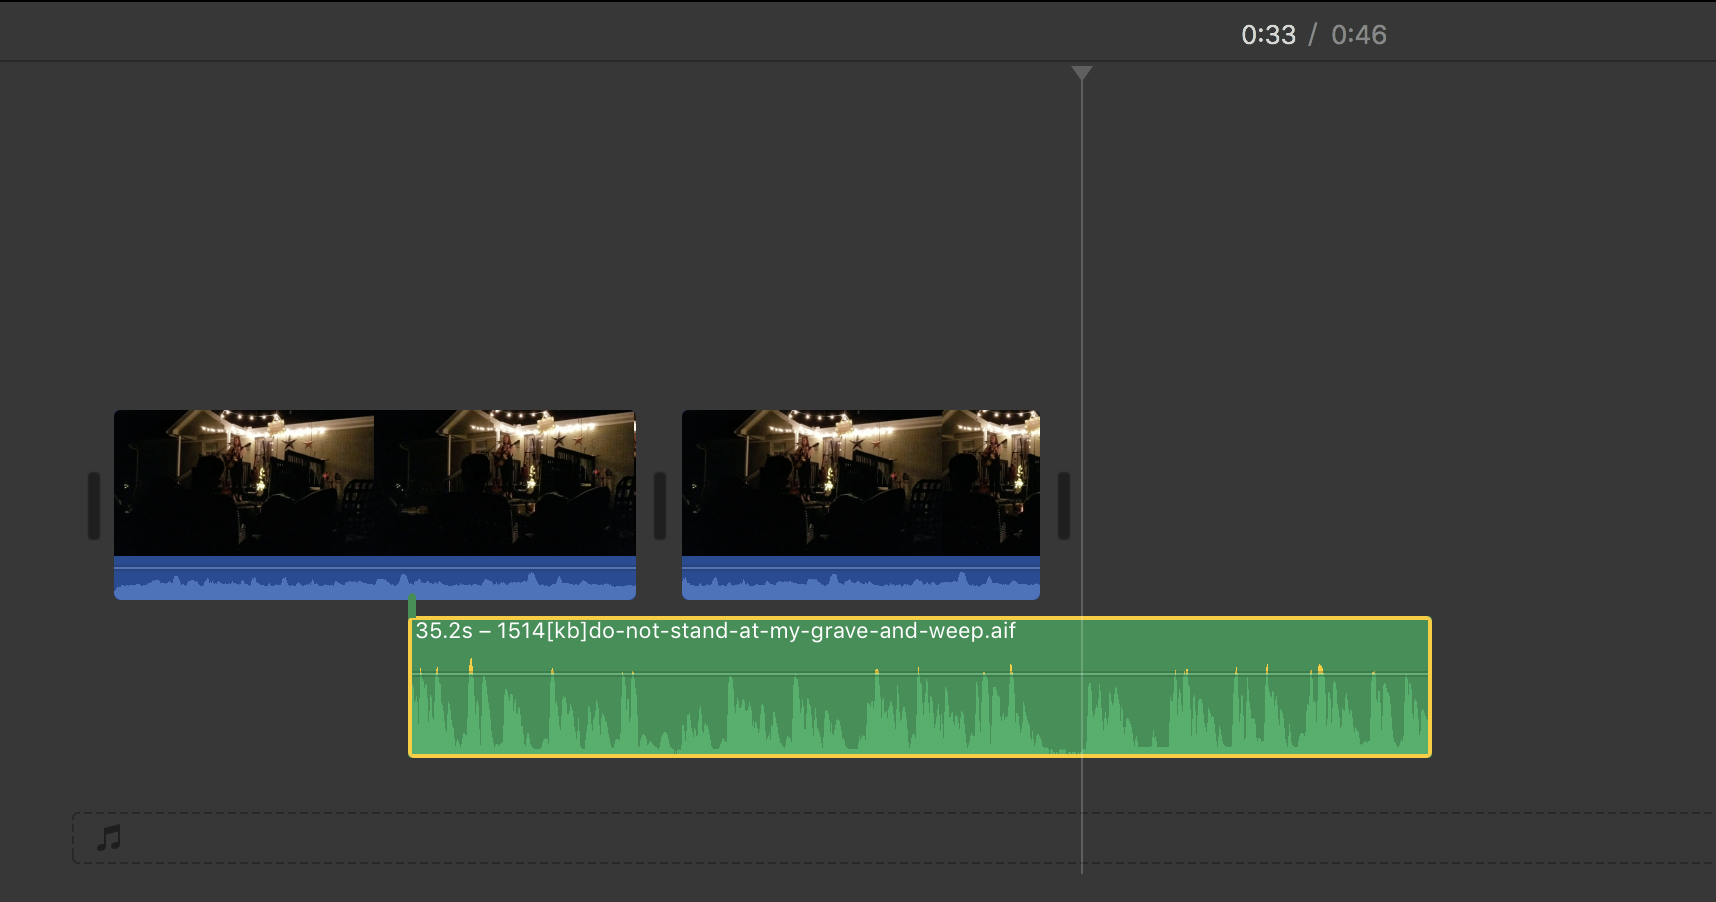
3. How to add audio
As mentioned before, the blue section under each clip is the audio attached to it. But you may want to add your own audio that you’ve imported into your video. Simply drag this down to the timeline you would any clip. It should sit at the bottom of the screen underneath your video clips. You can trim, move, and edit the audio clip the same way you can a video clip.
4. Advanced Editing
Visit our frequently asked questions to find more techniques on editing media in iMovie.
Once you have finished editing your video, it is time to export it and share it with the world. First, consider where you are showing the video. This especially should be considered when thinking about copyright. Here is an easy guide to copyright.
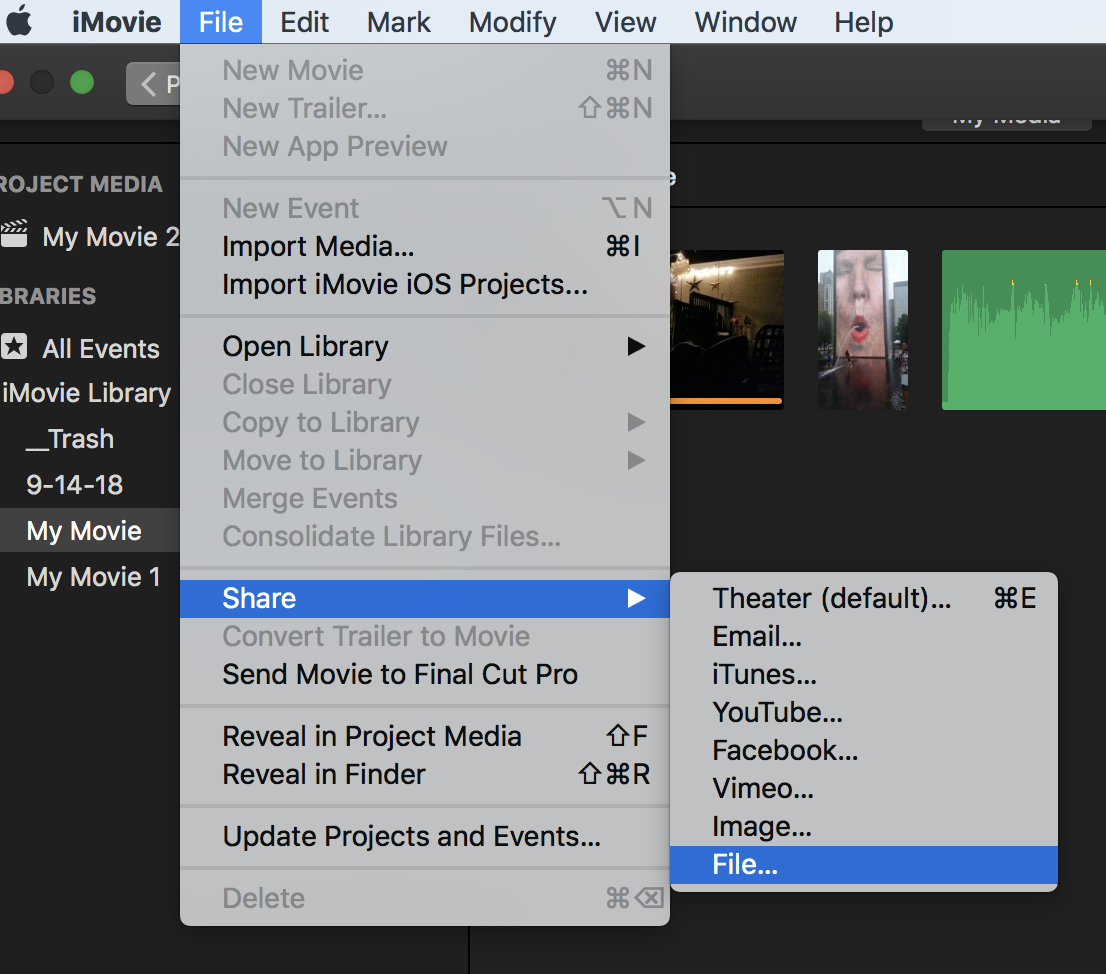
iMovie videos are automatically exported to .mp4 files which are the most commonly accepted video files. To export your video click on File>Share>File…
Once there, a dialogue box should open that will allow you to change the settings of how your video is exported.
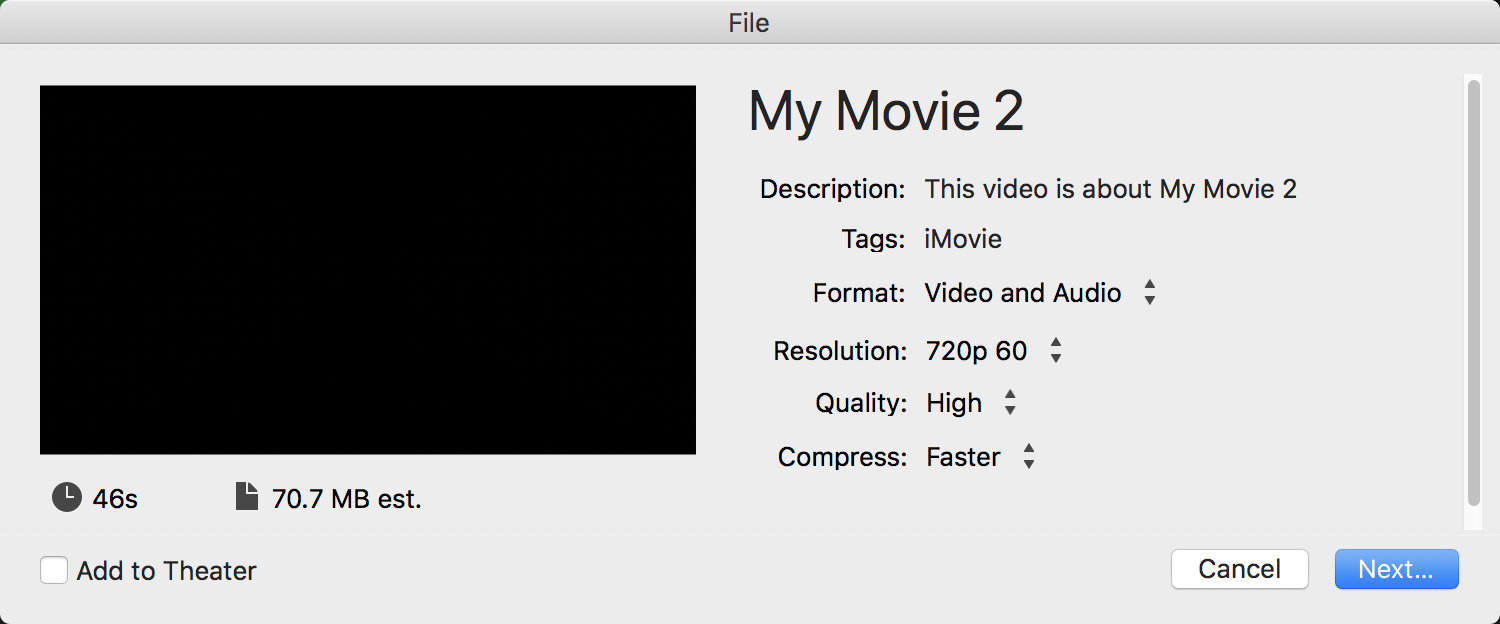
All of the settings you see above can be changed by simply clicking on them within this window except for “My Movie 2”. The format can be changed to video + audio to just audio if you only want an audio file exported. The resolution is the pixel clarity of the video. The higher the number, the larger your file will be, and the longer it will take to export. In general, try to keep 5 minute videos under 200MB for the fastest export time. Once all of your settings are satisfactory, click “Next…”

What should pop up is the “Save as..” window. Here you can change the title of your file and were it will be saved. Once done, click “save” and you will be met with a progress pie chart in the upper right hand corner fo your iMovie window.

This will tell you how far along iMovie is to exporting the video. This also is a good indication of how long it will take your file to be uploaded wherever it’s final destination is.